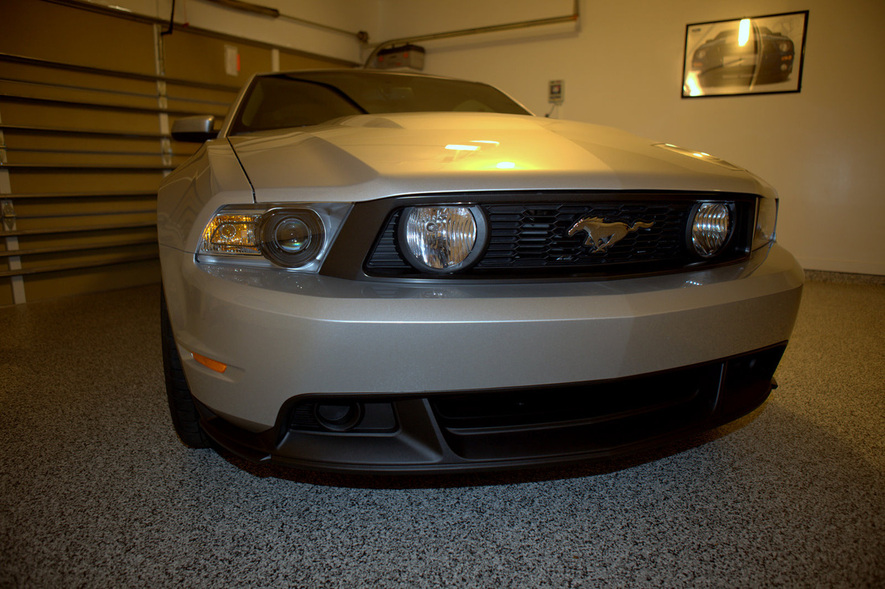
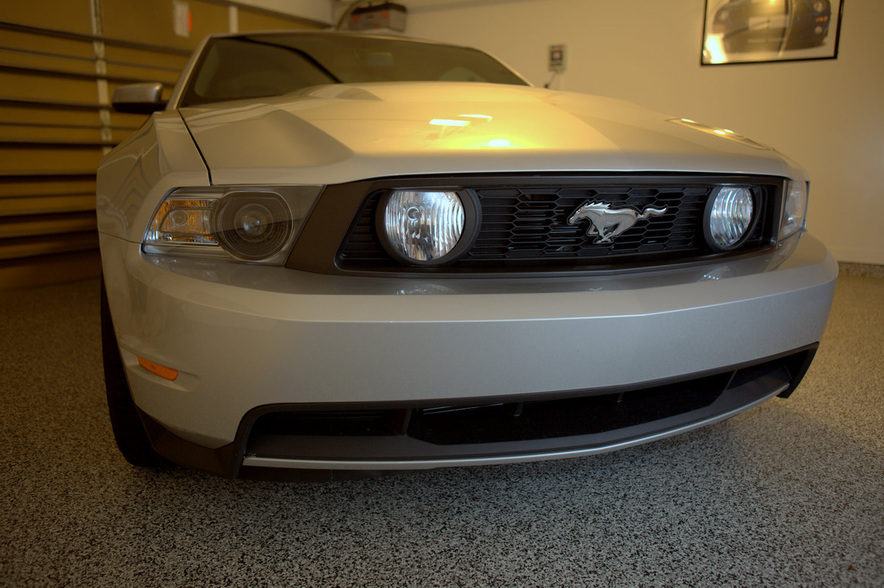
California Special Valance Installation
First off, this is about an hour install taking your time. It may be easier if you jack up the car and remove the front tires, but I didn’t.
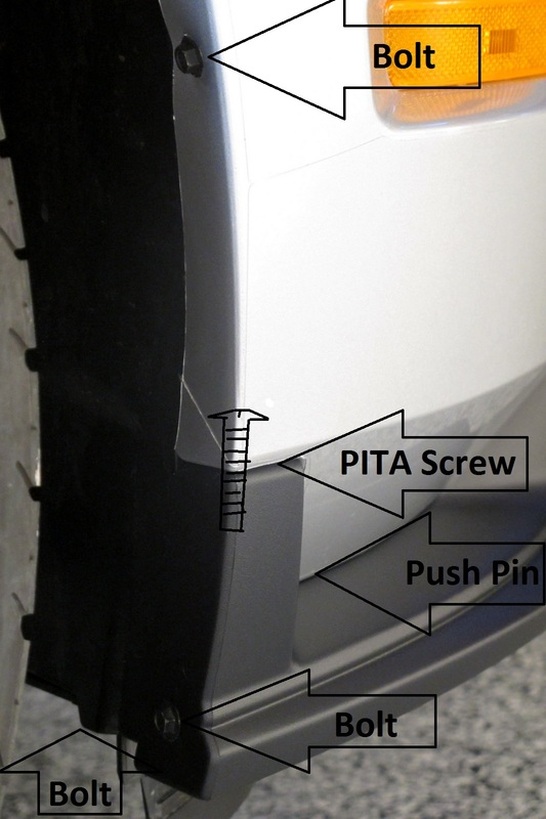
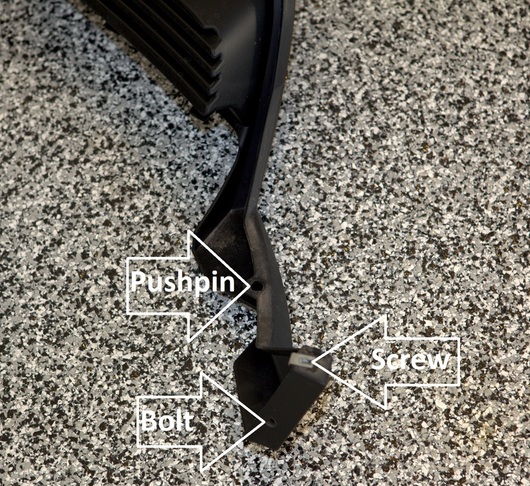
One side at a time. Remove the silver 7mm bolt in the far corner of the front valance from the bottom.
Remove the two black 8mm bolts inside the fender well that holds the fender to the splash shield.
Pop out the splash shield so that you can get behind it. You don’t need to remove the shield just pull it back so you can get your arm inside. Be careful not to let the metal clips scratch the paint. Find the black push pin about 12 inches inside. It will be facing down. Pull the center piece up and then remove the entire push pin. You may need pliers for this part. This pin holds the lower bumper to the lower front valance.
Remove the Phillips screw that holds the lower front valance to the bumper. This screw is hard to get to and is inside behind the splash shield. The screw threads up and down. This is the part that having the tire off would
be easier. I have a racketing 90 degree screw driver I used so I was able to remove it.
Repeat for the other side.
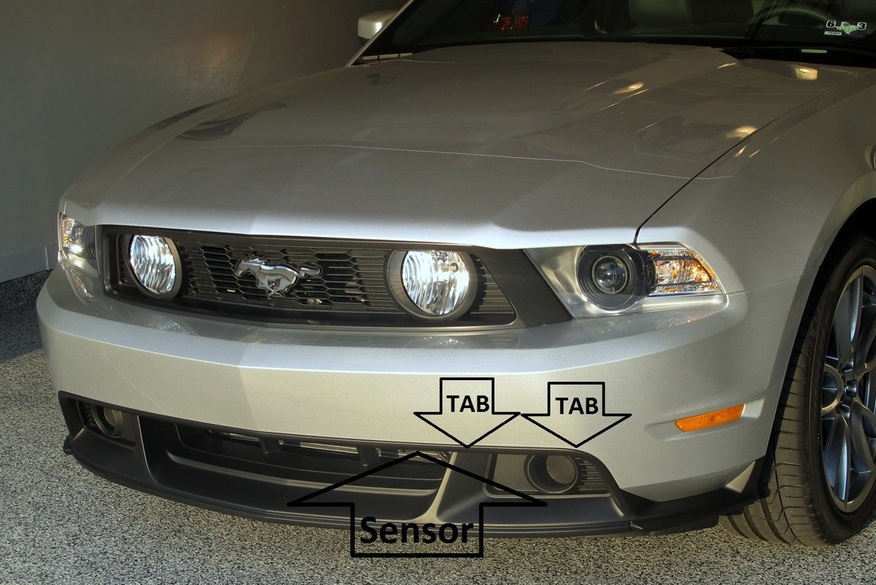
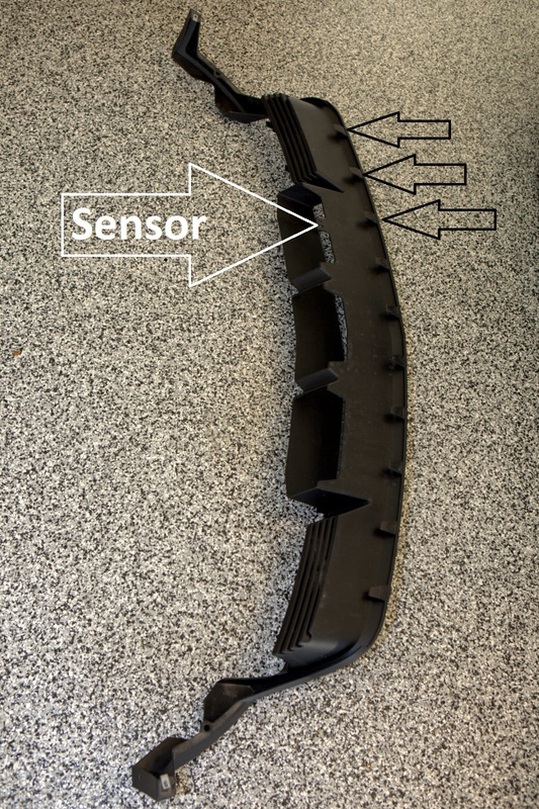
Unclip the sensor on the front valance and tuck it back out of the way.
Now, at this point you should have all the screws removed. I recommend putting a thick rag or towel on the ends of the valance you are removing to keep it from scratching the lower bumper cover. Wiggle the lower valance and make sure it is pretty loose. Reach in through the fender splash shield and push down on the tabs holding the bumper (look at the new one to see what I’m talking about). It is easier having two people for this part. Pull the bumper forward working the tabs out of the bumper. Slowly wiggle and pull the lower valance out.
Once you have the stock valance removed, it is time to install the new one. Clean all the points on the bumper where the valance contacts it. Put the towels on the ends of the new valance. Start installing it on the car and make sure when you insert the tabs on the valance into the bumper you have them all lined up properly. Before you snap it all the way on, check the corners to make sure they are not catching on the front of the lower bumper cover.
Once you have the lower valance snapped on, install the bolts, screws and push pins in the opposite order you removed them.

