2012 Mustang Shaker 500 - Add a sub to the stock radio
Components:
Massive N3 Monoblock amp with dash mount remote control
AudioControl LC2 Line Converter - On Amazon https://amzn.to/2WpW8L0
Schosche 4 Gauge Amp Kit - On Amazon https://amzn.to/2DDuNO3
JL Audio Stealthbox - On Amazon https://amzn.to/2DH3kvb
Box of tie straps
Note: The factory amp in a 2011 is different. 2011 will have two amps compared to the 2012 single amp.
Ok, so since I bought a car with Navigation, the Shaker 1000 was not an option. After hearing the Shaker 500 I decided that adding a sub to the trunk would make a decent sounding system without ripping it all out. Later on,
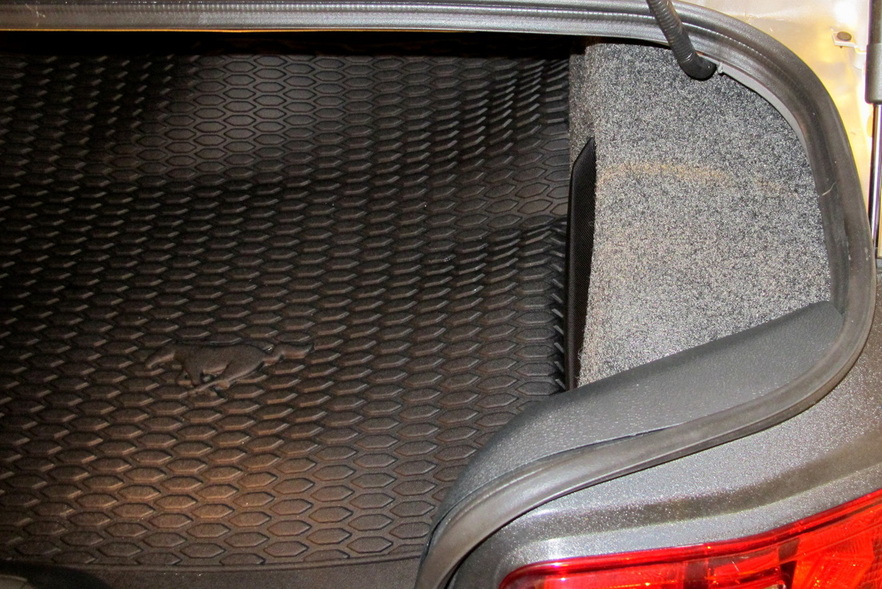
I may replace the 6x8's to pick up some crisper highs. As you can see I didn’t cut the carpet or the rubber mat yet. I plan to cut the rubber mat this week to make it fit around the box better and just tuck the carpet in the spare tire compartment.
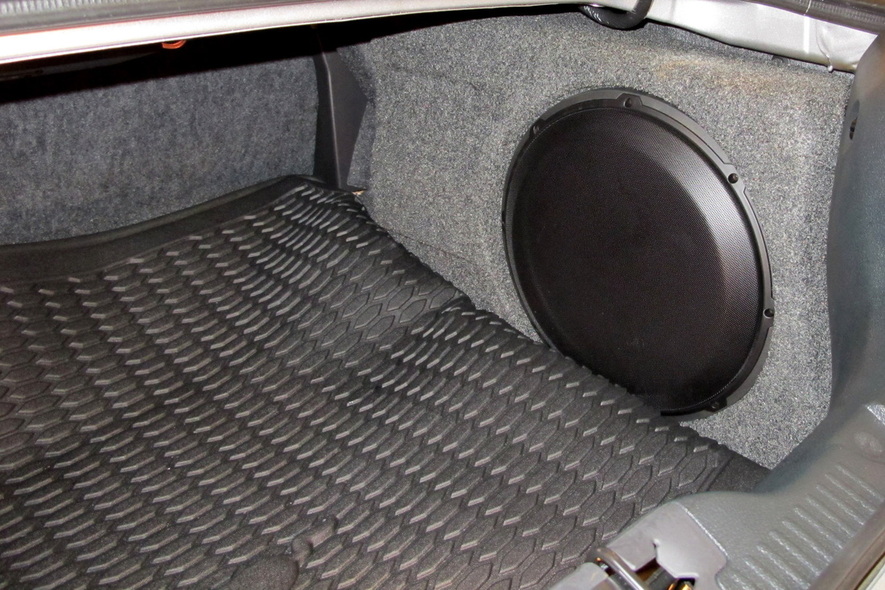
As you see, I still have plenty of trunk space. Considering the amount of sound this sub puts out, I'm very happy with it.
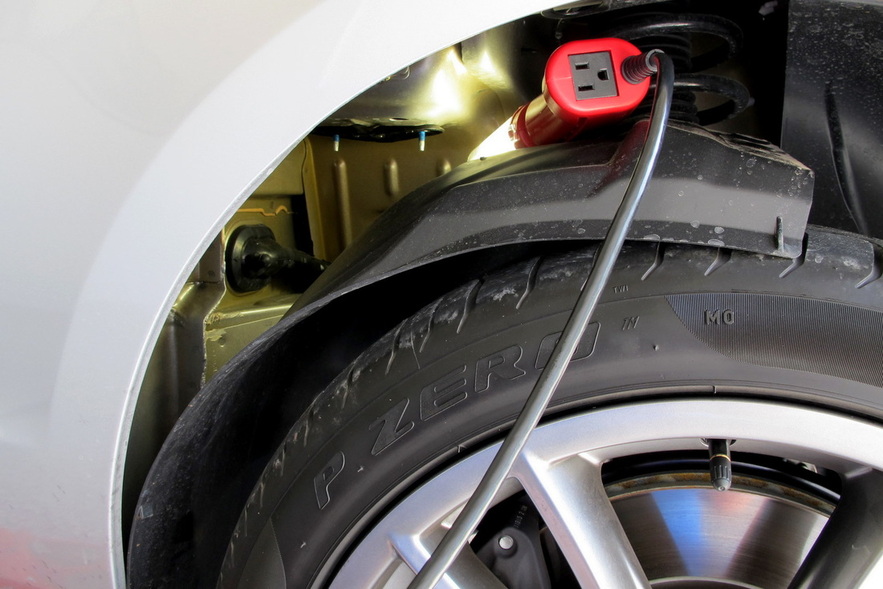
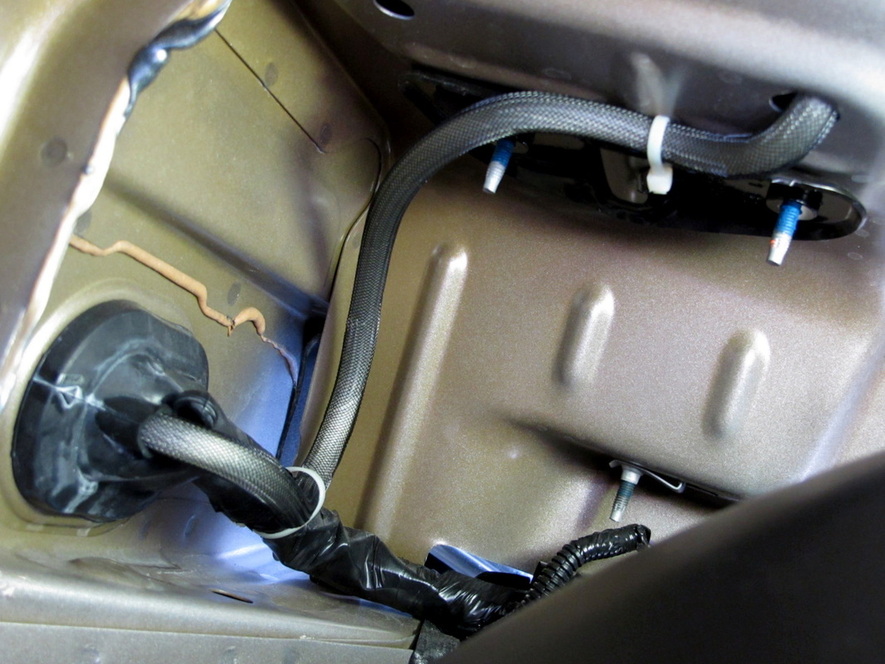
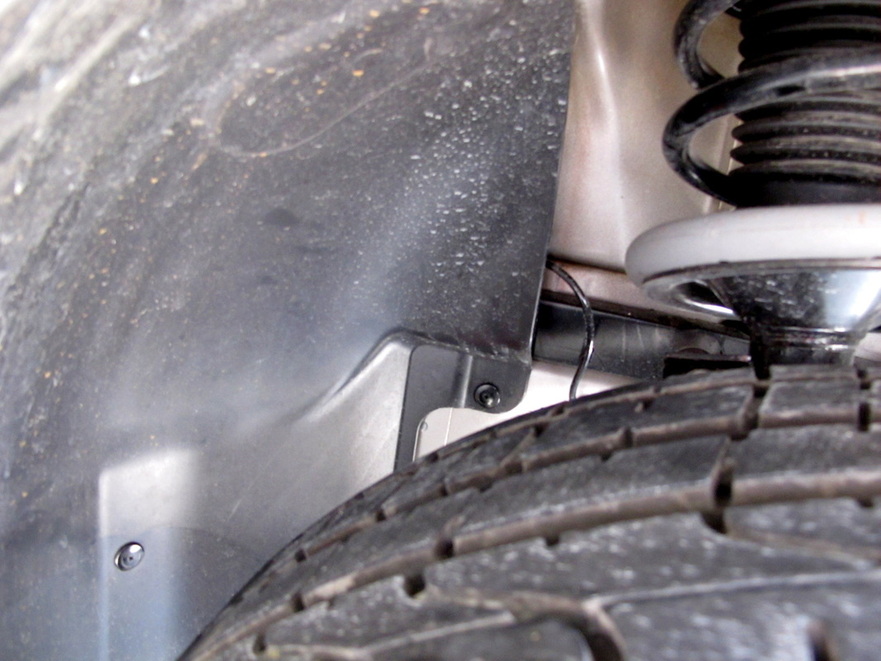
So, first off, I started by running the main power to the trunk. I removed the pins holding the inner plastic splash guard and dropped it down. Jacking up the car a few inches gave me plenty of room without removing the wheel.
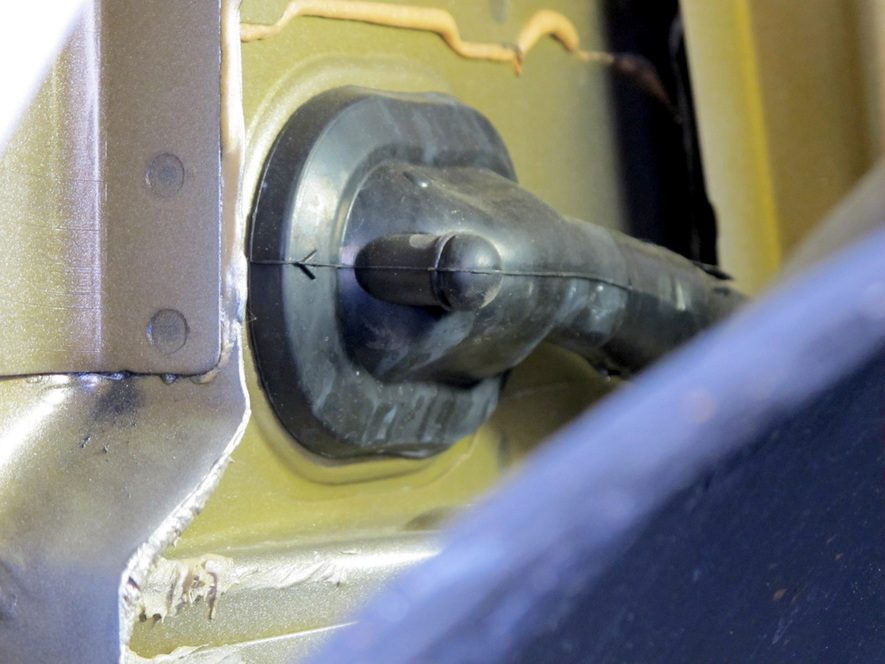
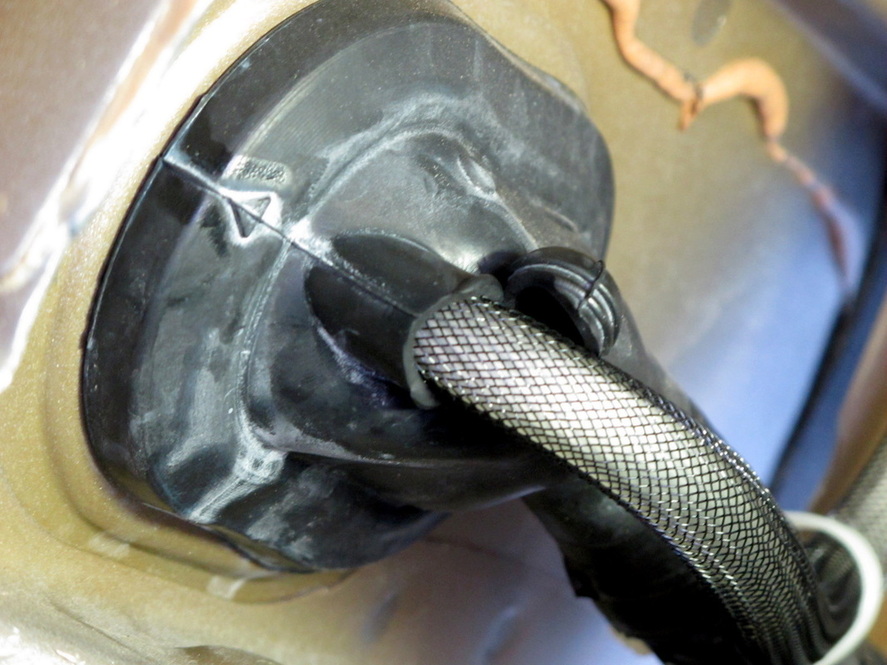
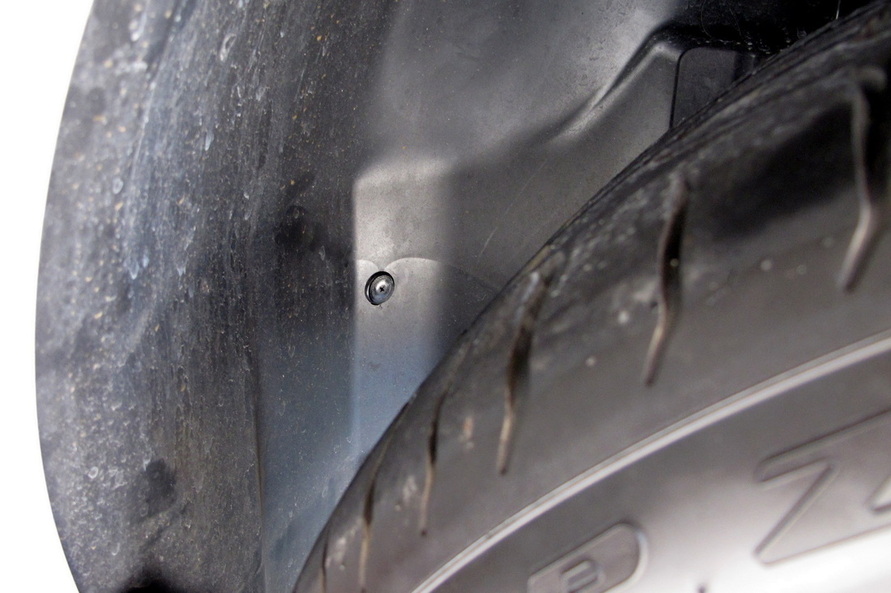
Find the rubber grommet and cut the nipple off it. I cut about 3/4's of the way around. I didn’t cut it completely off so that when I remove the sub, I can glue it back on.
I dropped the wire down through an existing hole under the battery. I then tie strapped it out of the way so that it won’t rub on the inner splash guard.
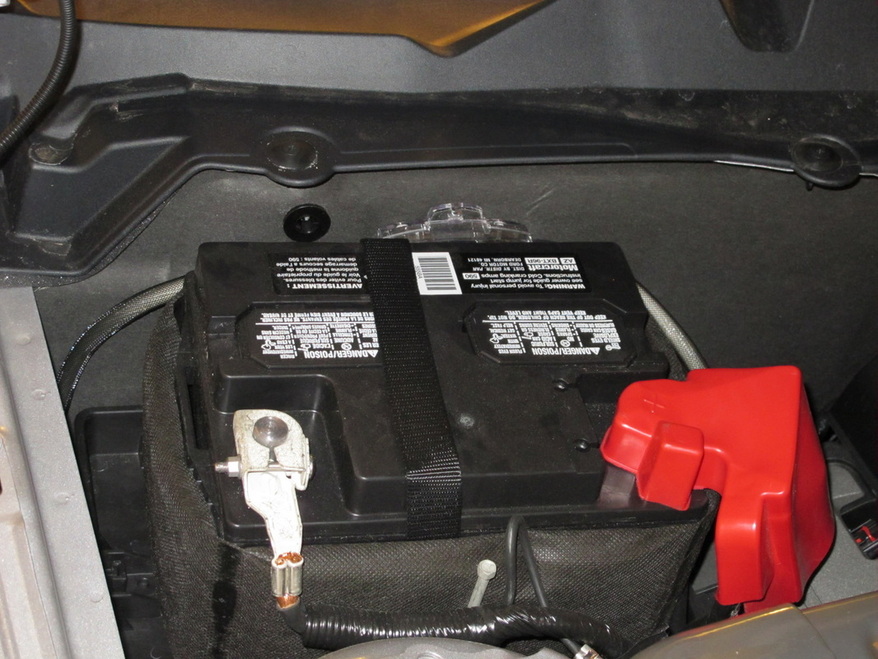
I connected the wire to the battery using this nut on top of the terminal. (This was the last thing I did. Don't do this until you have the wire connected to the amp and the ground wire attached)
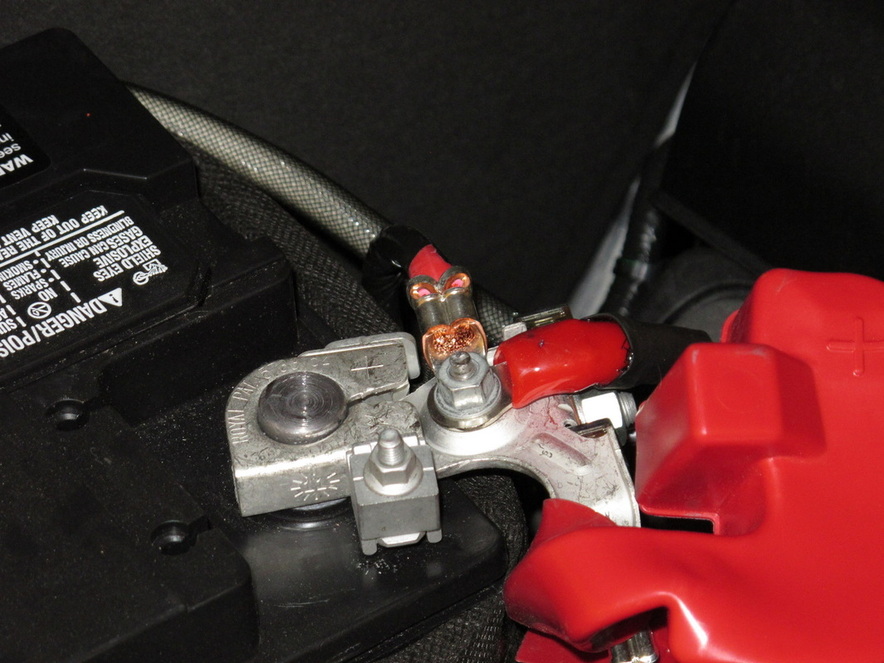
Tuck the fuse and wire behind the battery.
The grommet was made to run a wire through this location. The inside has a hole just waiting for a power wire to be pushed through it.

Reinstall the splash guard. Make sure when you reinstall the push pins in the inner plastic splash guard that you get them all snapped back in correctly. The two lower ones are the worst ones to get lined up. If you don't get them completely snapped in, you will hear a flapping sound at 60mph + as the sheild flaps around. (I'm speaking from experience.)

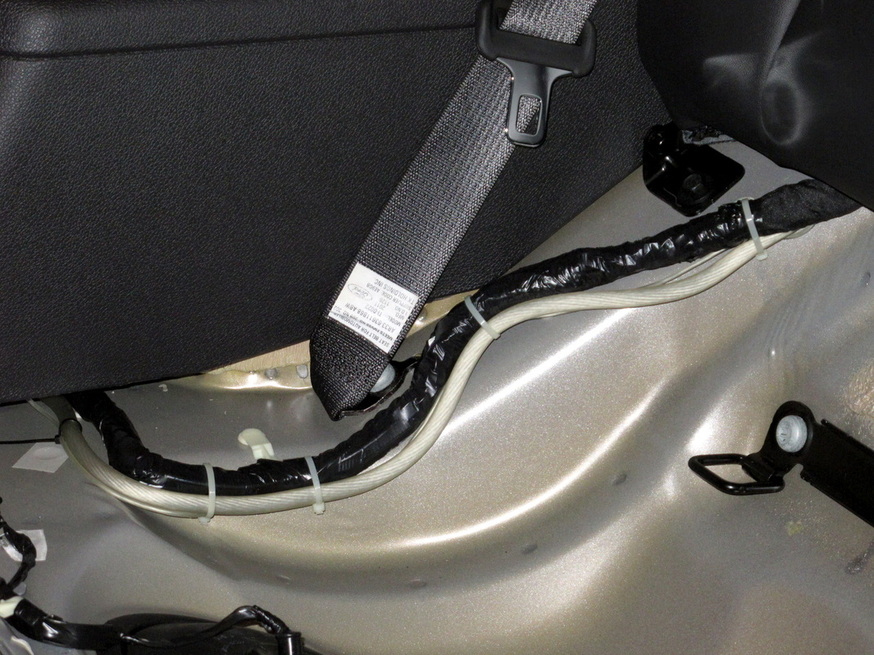
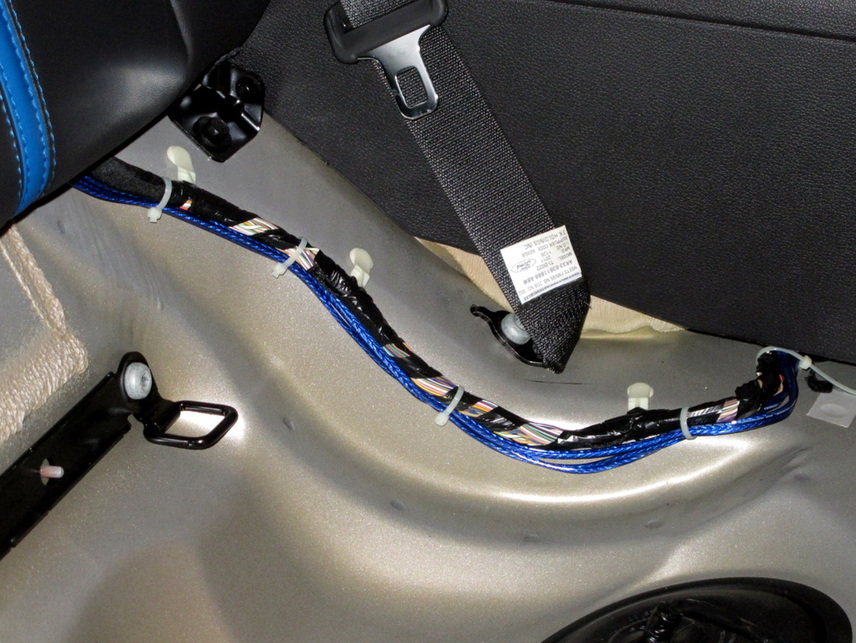
Tuck the power wire up under the plastic panels and door trim. Remove the back seat by pushing the button locks, there are two on each side. Run the wire next to the factory harness to the trunk. I tie strapped it to make sure it didn’t move. If you haven’t caught on yet, I like to tie strap wires in place.
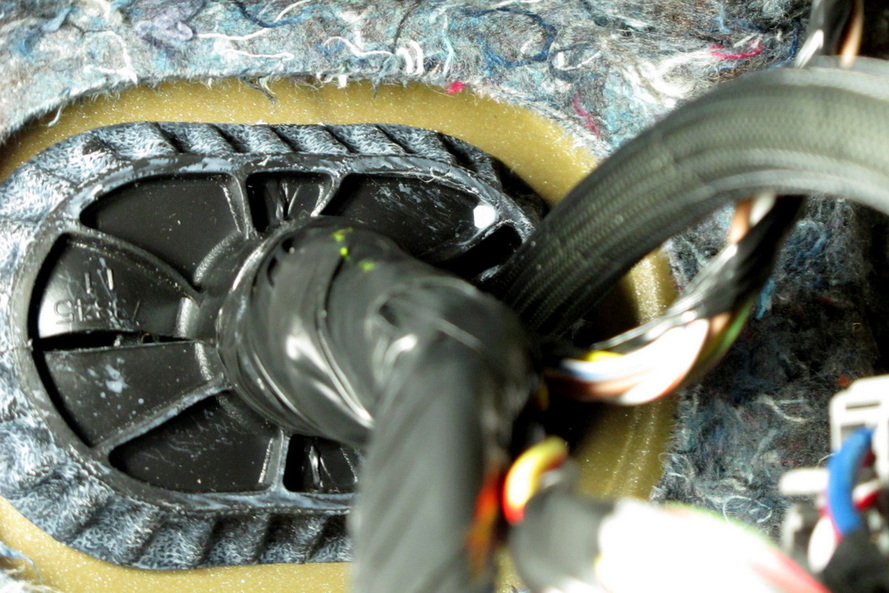
To get a clean signal from the factory system I used a AudioControl LC2. Since I used the LC2, the instructions say to connect to the output of the factory amp, not the signal lead in. These wires are located in the gray connector. The amp is located in the drivers side kick panel.
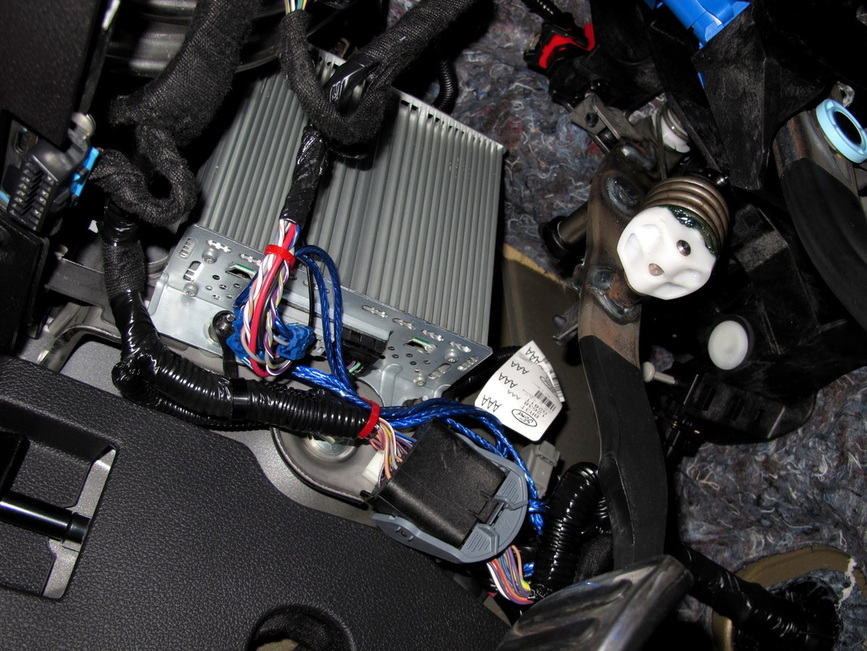
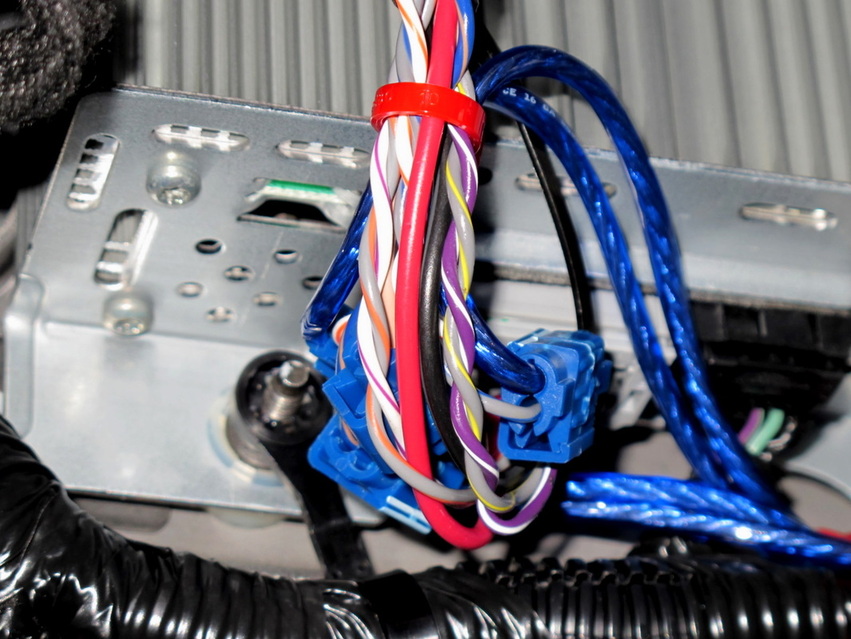
This amp powers only the 8 inch door subs. You need to tap into the amp output for the line converter. The door speakers are dual voicecoil. I choose to tap into the signal going to the first voicecoil of each speaker (pins 1,2,5 and 6).
I then tie strapped the wires to the rest of the harness.
Just like the power cable, I tucked the wired under all the plastic trim and tie strapped the cable to the factory harness. Since I used the LC2, I did not need to run a remote turn on for the amp because the LC2 has the GTO feature. This was a big selling point to me. That makes one less wire to run and one less wire to tap into key-on power.
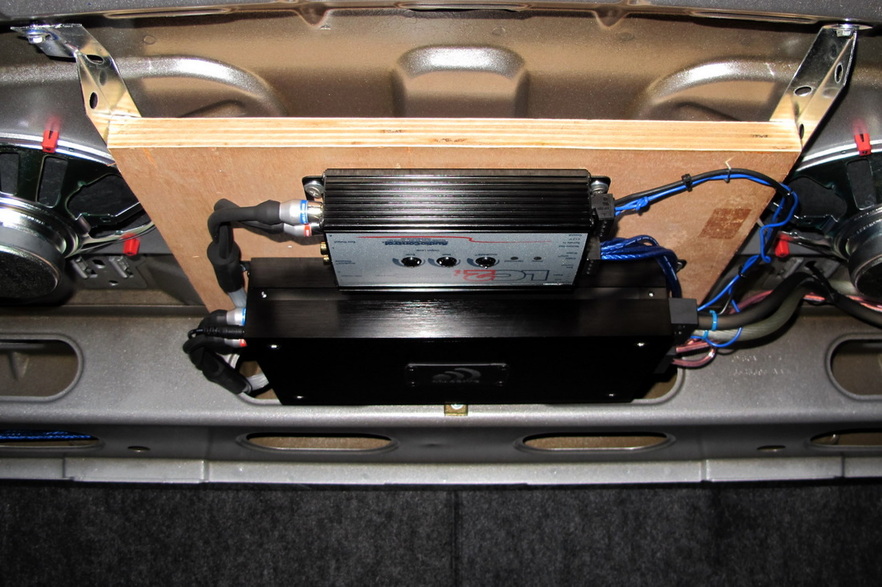
I didn't want to screw the components into the rear deck for fear the screw tips would be popping through the carpet. With a small peice of plywood, a couple metal brackets, I mounted the amp and LC2 to the bottom of the rear deck. As you can see, there is plenty of clearance for loading stuff in the trunk. I tie strapped all the wire up and out of the way.

Follow the instruction manual for wiring up the amp and LC2. I pulled the power and ground for the LC2 from the amp connectors.
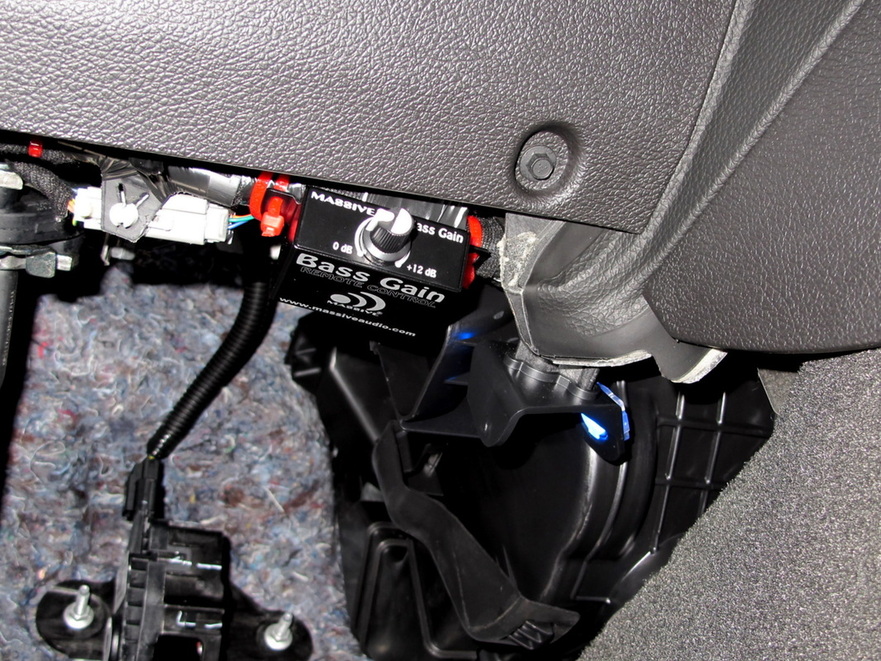
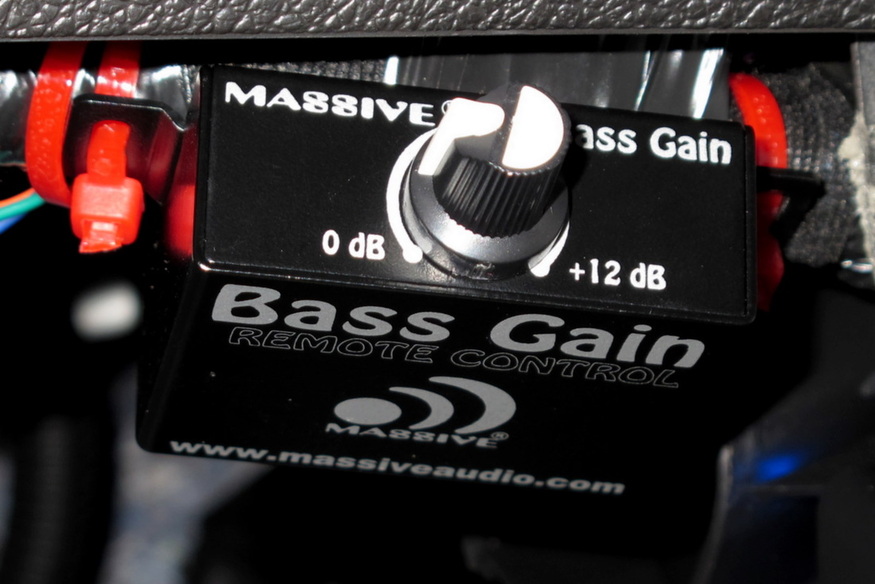
Mounted above the accelerator pedal is the bass gain control for the amp. In my opinion this is needed to adjust the sub on the fly.
That is it. The install is complete. Hopefully this write up helps someone else.
We are a participant in the Amazon Services LLC Associates Program, an affiliate advertising program designed to provide a means for us to earn fees by linking to Amazon.com and affiliated sites.
